Virtual Unwrapping with VC3D
Last updated: July 12, 2026
VC3D is updated frequently. Follow along in Discord for the latest changes.
In this tutorial, you will see how to open a CT scan of a scroll in VC3D, our specialized software for virtual unwrapping, and how to segment part of the papyrus surface.
Installing VC3D
Downloads for all operating systems are available on the releases page of the villa repository.
- Mac (Apple Silicon)
- Windows
- Linux
- Docker
- Download the macos .dmg file from the releases page of the villa repository.
- Double click the .dmg file, and drag/drop it into applications (you may have to right click the dmg and click 'open'.)
- Download the windows installer .zip file from the releases page of the villa repository.
- Extract the contents of the .zip file to a folder of your choice.
- Double click the install file, click "show more details" and then "run anyway"
- Follow the prompts, clicking yes or next where necessary
Currently, the application must be built from source on linux. There is an install script at the volume-cartographer root (villa/volume-cartographer/build_from_src_debian.sh) that will handle this build for you
cd villa/volume-cartographer
chmod +x build_from_src_debian.sh
./build_from_src_debian.sh
Prebuilt docker containers are hosted on the GitHub container registry. To use them, run the following command:
docker pull ghcr.io/scrollprize/villa/volume-cartographer:stable
Launching the GUI
Depending on your install method or operating system, the application may be launched in different ways.
- Mac: Open the application from the Applications folder
- Windows: Open the application from the Start menu
- Linux: Navigate to the build folder and run the VC3D app. example:
cd build/bin && ./VC3D
Using VC3D
Viewing a scroll
VC3D is intended as a viewer of scroll data and to assist in the virtual unwrapping of scrolls, so the fastest way to get familiar with it is to unwrap some part of a scroll. Let's start with PHerc1447. This scroll (as of July 13, 2026) has no public surfaces, so let's make one. You should see the open data catalog window in the VC3D gui when you launch it, and from here we can select our sample:
if the data catalog is not visible, you can reopen it
- File → Open Data Catalog…
- Select PHerc1447 and either double click or press Open Sample
After a brief wait to download any necessary data, you should see the scroll data in the xy and yz planes (the two viewers to the right) and a large blank window to the left.
General navigation tips:
- You can zoom in and out in any viewer by using the mouse wheel.
- Use right click to pan the view, and either
ctrl+clickorRto move the focus point. When the focus point is moved, the other planes will all align with it, so you are seeing the same location in the scroll volume from different planes/orientations. - You can rotate the yz plane either by dragging the green handle in the xy view, or by pressing the mousewheel in and dragging the mouse in the yz view
- You can slice through the planes by holding shift and moving the mousewheel up or down
- You can increase the sensitivity of any navigation actions by changing the settings in
Viewer Controls → Navigation
PHerc1447 has recto surface predictions available from the open data catalog, and these should pre-populate in your overlay selector. Let's take a look at this volume with the surface predictions overlaid:
Growing surfaces
Now that we've got all our necessary data, we can create our first segmentation. Let's find a place on the volume we would like to see unwrapped, and use ctrl+right click to bring up the volume actions menu.
From here, click Create Segment (GrowPatch), and a dialog box will pop up. From the volume selector, ensure that the volume containing "surface" is selected, set your growth iterations to 35, and check that
the output path is to the desired location (by default, this will go to your open data catalog folder in a "patches" folder for the selected volume, you do not need to change this).
You should see another dialog box pop up, and it will show the progress of the current segmentation growth. After a brief wait, it should say "Successful". Click OK and then click on Volume Package, and you should see your segment.
Click on it to show it in the flattened view on the left. You can also see how the 2D sheet surface is situated in the original CT volume in the xy and yz views -- the orange line in these views shows where they slice through the sheet you have segmented.
A high quality segment should follow the sheets in the cross-section views, and also have the horizontal and vertical fibers clearly visible in the flattened view -- this indicates the segment is followimg the original written surface of the papyrus accurately.
This segment, while currently small, can be used already either for ink detection, as an input to the spiral fit, or for training data. Any segment created by VC3D, regardless of how big, is in this same format.
Growth tips:
- the more iterations you have selected, the bigger the resulting segment, but the longer it will take to complete. Later iterations take longer due to the edges of the surface being longer.
- Try and select an area that is on the surface predictions to get better results.
If we want to make our segment larger, we can do this easily with the built-in segmentation tools. Click on Segmentation and Enable Editing. You can then use either the growth button or keybinds to grow in a desired direction.
1to grow left,2to grow up,3to grow down,4to grow right,5to grow in all directions- The
stepsspinbox in the segmentation tool can be used to increase or decrease the number of steps to take in each direction (a step being roughly 20 voxels)
Winding Annotation
VC3D can be used to create winding annotations for the spiral fit (see the inputs section of the spiral fitting document for more details on how these are used). VC3D outputs these primarily as patches (segmentations) or point collections. See In-depth: Winding Constraints for more on why these annotations matter and how they're used.
When generating data for the spiral, we can think of the inputs broadly as two types of annotations:
- same-winding annotations (fibers, patches, kolleisis, points along surface preds, etc)
- relative or different winding annotations (generally points which move outward radially across sheets rather than along them)
If you've been following along with this guide, you've already created a same-winding annotation in the form of a patch (see the previous section).
A same-winding annotation is simply some set of points which say "these points are all part of the same sheet of the scroll". Conversely, a relative or different winding annotation is a set of points which say "these points are part of different sheets of the scroll, and they are this many windings apart"
These can be generated in an infinite number of ways. VC3D has built-in tools for generating a few examples of them:
Fibers (same-winding)
A tool to manually add control points to a line annotation (which we often use to target fibers), with interpolation and extrapolation assistance via lasagna normals.
- Note: lasagna normals must be present to use this tool
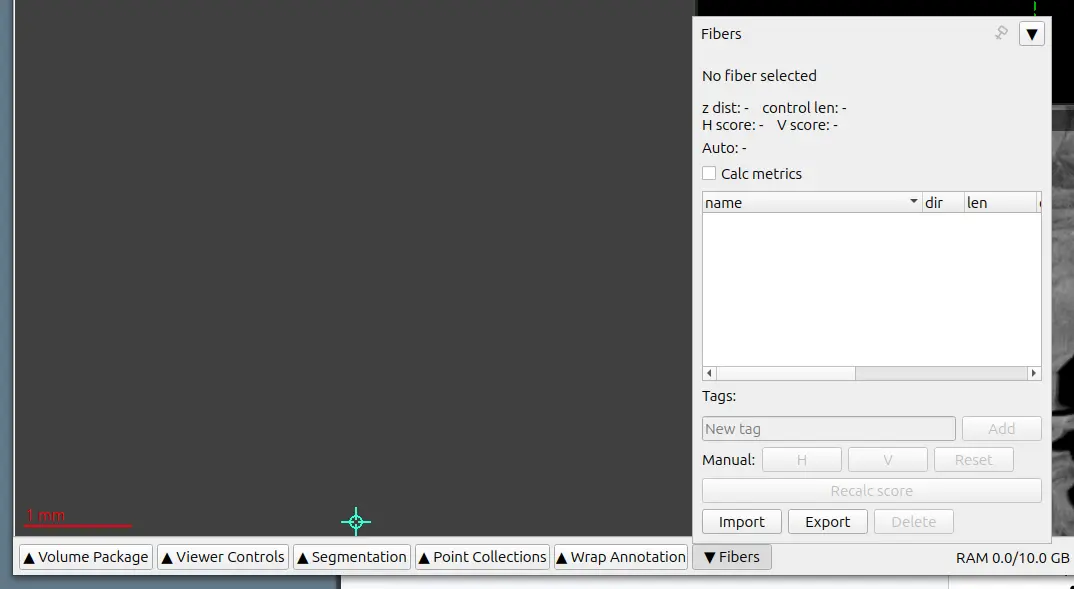
To start a line annotation: Ctrl + Right click on your starting point in the 3D volume, then select Line Annotation. The first time, you will be prompted to load the lasagna normals.
A line annotation workspace will launch, with 4 viewers:
- Top left: XY plane
- Top right: orthogonal plane, similar to the YZ plane
- Middle: a flattened fiber view
- Bottom: a flattened fiber view, orthogonal to the middle plane
To pan along a fiber:
- Move the mouse pointer over the middle or bottom view
- Shift + Wheel while the mouse pointer is in one of the top viewers
To annotate:
- Press Spacebar to freeze panning via the mouse pointer
- Left click to add a control point
- A reoptimization takes place after each control point is added
- To delete a control point, use Ctrl + Right click → Delete control point
Manually created Point Collections (relative or same-winding)
You can manually place points by enabling annotation and using shift+click in any of the volume views. Using this method, you can create either a relative or same-winding annotations easily. If
you have a patch already loaded, these annotations can be even more influential in a later fit. You can think of them as extensions of the patch itself, and they can be used as edges in a patch graph if you
want to connect sparse patches.
same winding place points along the surface of the scroll, beginning partially inside a patch and extending outward
relative winding place points outward radially, indicating the winding offset between points
Same-winding using the wrap annotation tool
You can use the same-wrap annotation tool to quickly create same-winding annotations along surface predictions. Each tool uses shift+click (or shift+click+drag for the manual tool) to place tentative points, which
are then "commited" to point collections with shift+e
Viewer Controls
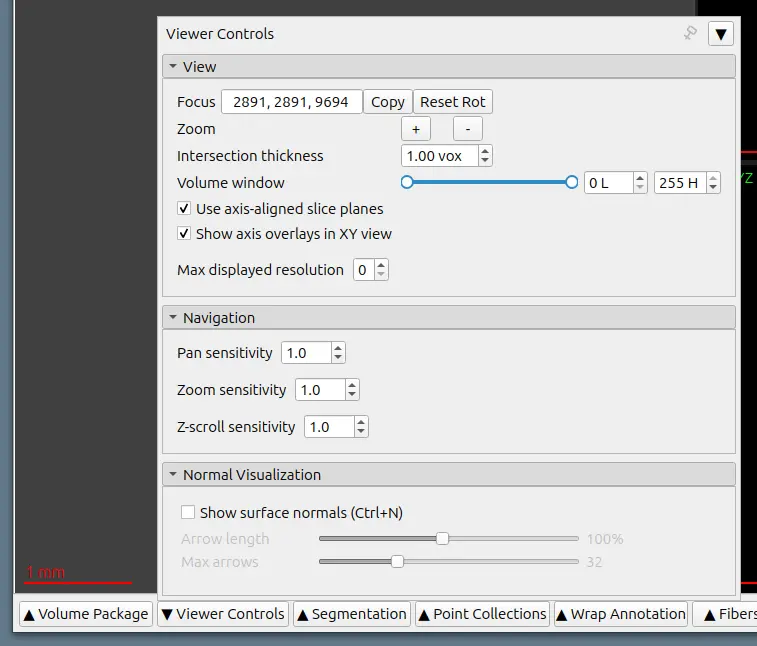
- Focus point — hover the mouse in 3D; the keybinds Ctrl + Left click or r move the focus point to those coordinates
- Intersection thickness — adjust segment line thickness in the 3D volume windows
- Volume window — manually threshold/window the volume data
- Show axis overlays in XY view — toggles visibility of the YZ axis plane adjustment tool
- Max displayed resolution — increase if streaming is slow